


Love tea and Halloween? Think the two don’t go together? You’re dead wrong! We’ve put together some really ghoul ideas to help you throw a to-die-for Halloween partea.
First: Set the Mood
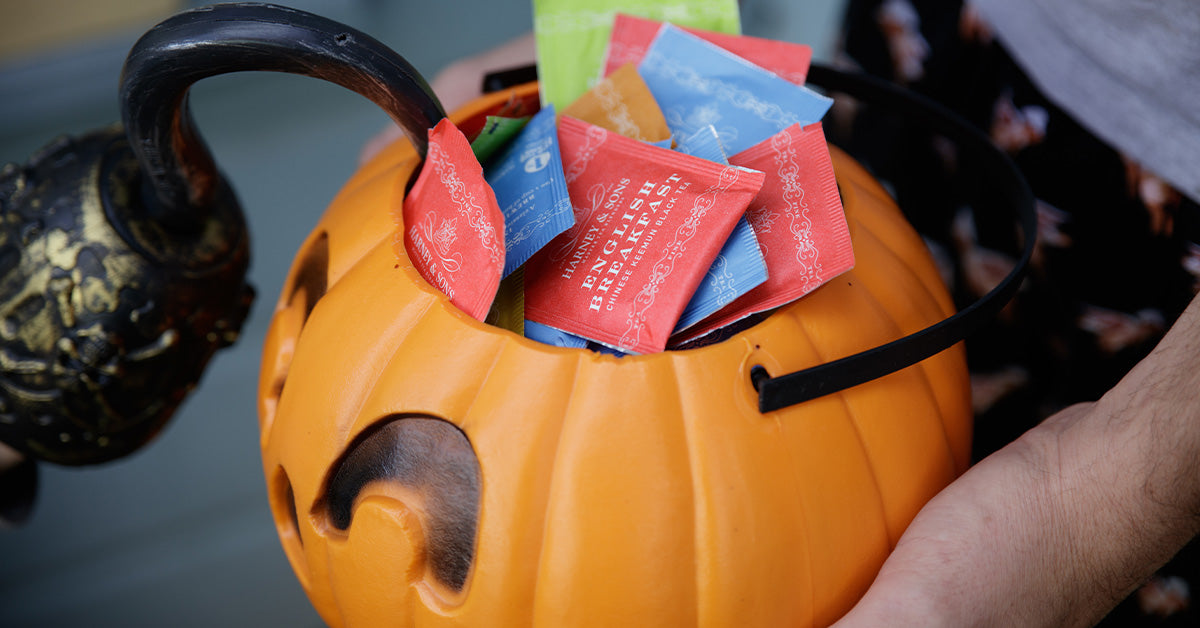
A proper Halloween party needs a proper setting. One great way to get your Halloween theme on display is using our tea sachets as mini ghosts. Just take some white cloth, size it for a ghost costume for a sachet with eyes cut out and a jagged-edge bottom, make a tiny slit in the top to slip the tea tag through and hang them around on wire, dangle from light fixtures, etc. They make adorable little sachet ghosts and double as an otherworldly cuppa after you’re done!

Need some spooky lighting? Got some empty Harney tins sitting around (sure you do!). These DIY tin lanterns are just the thing to give your party that spooky Halloween tea-themed atmosphere. Find instructions and a short video at our DIY Fall Tea Tin Lanterns post. Your guests will say you nailed it!
Second: Spooky Sips and Snacks
No party is complete without food and bev, and no Halloween party is complete without fun, to-die-for drinks, and nibbles. The only problem is witch one will you choose?
Last year, we created a Spooky Tea Potions blog with some great options. These recipes can be made as cocktails or mocktails – it’s up to you – and no hocus pocus is involved. Trick them out with Halloween trimmings for a special treat!
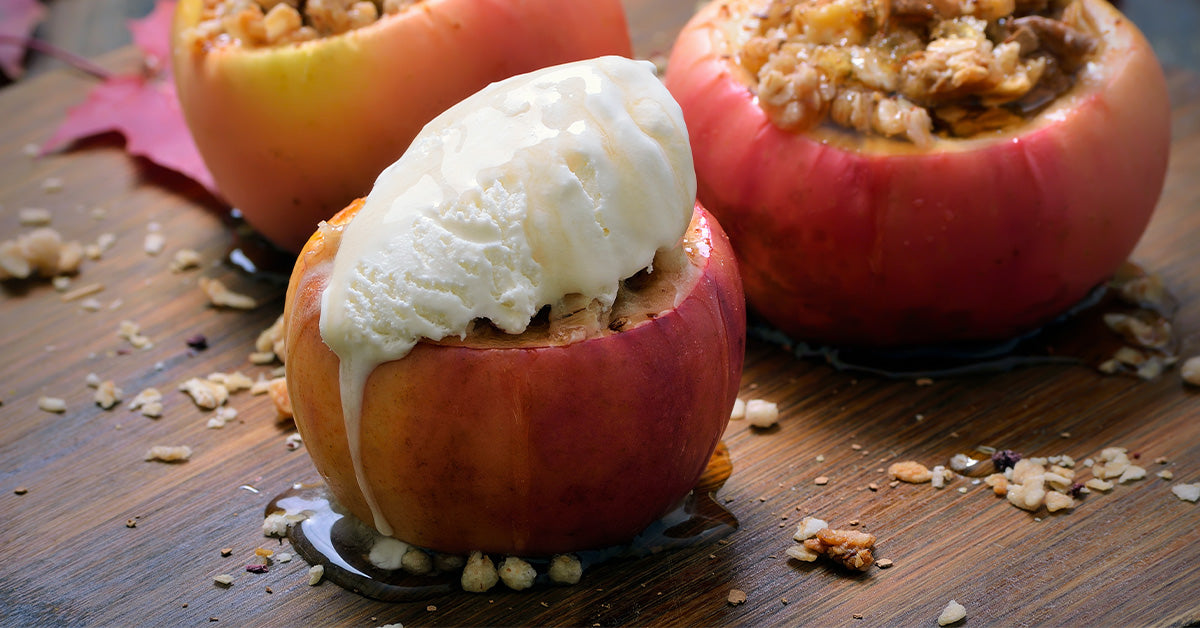
When it comes to digging up some lively edibles sure to please even a monstrous appetite, we’ve got three sweet treats featuring our Fall Harvest Trio teas as ingredients. These killer recipes will have your guests talking long after the party has died.
Poison Apples

Ingredients:
- 10 small apples
- 10 long sticks
- 1 ¾ C granulated sugar
- ½ C light corn syrup
- ¾ C Hot Apple Spice tea
- ½ tsp purple gel food coloring
- ¼ tsp black gel food coloring
Instructions:
- Insert wooden sticks into the center of each apple and set them aside.
- Line a large baking sheet with parchment and grease with butter or cooking spray.
- In a medium saucepan, combine sugar, brewed Hot Apple Spice tea, and corn syrup. Stir in gel food coloring and turn heat to medium-high. Bring the mixture to a boil and constantly stir until sugar dissolves. Then lower the heat to medium and let it boil, without stirring, until it nears about 290°F with a candy thermometer – close to the hard-crack mark stage. Remove from heat.
- Working quickly, tilt the pan and dip the apples in the mixture, twirling the apple through the candy to coat evenly. Hold the apple over the mixture for a few seconds before placing on the greased baking sheet. Repeat with the remaining apples. Let cool completely.
Pumpkin Spice Crispy Rice Ghost Treats

Ingredients:
- 1 ½ sticks (12 tbsp) salted butter, plus more for the pan
- 3 10-oz. bags marshmallows
- 18 C crispy rice cereal
- 1 tsp pumpkin pie spice
- 1 sachet Pumpkin Spice tea, cut open and loose tea used
- ¼ tsp yellow food coloring
- ¼ tsp red food coloring
- Ghost cookie cutter, or other preferred shape
- 10 oz. white chocolate or white candy melting discs
- 2 tbsp mini chocolate chips
Instructions for the Treats:
- Butter a 9x13” baking pan and line with parchment paper, leaving a 2-inch overhang. Melt 1 ½ sticks of butter in a large pot over medium heat. Add the marshmallows and cook, stirring, until melted.
- Stir in the pumpkin pie spice, Pumpkin Spice tea, and food coloring until blended.
- Remove from heat and stir in the crispy rice cereal, a few cups at a time, until combined.
- Firmly press the mixture into the pan. Let cool completely.
- Use the parchment overhang to lift the treats out of the pan.
- Using a ghost cookie cutter, cut the treats into shapes and place them on a parchment-lined baking sheet.
Instructions for the Icing:
- In a medium bowl, melt your white chocolate in the microwave for 30 seconds; remove to stir. Continue this until the white chocolate is melted. Be careful, white chocolate burns easily if heated too high.
- Dip one side of the ghost treat into the white chocolate. If you are having trouble doing this, you can spread the white chocolate on top with an off-set spatula. Immediately press 3 mini chips into the ghost to make the eyes and mouth.
- Place the treats back on the lined baking sheet so the white chocolate can set.
- Serve immediately or store in an airtight container for up to 3 days.
Witch Finger Cookies

Ingredients:
- Cooking spray
- 2 C all-purpose flour
- ½ tsp baking powder
- ¼ tsp salt
- 1 sachet Cranberry Autumn tea, cut open and loose tea used
- ½ C (1 stick) unsalted butter, at room temperature
- 1 C sugar
- 1 large egg, at room temperature
- 1 tsp pure vanilla extract
- Green food color, if desired
- Large sliced almonds, one for each cookie
- ½ C raspberry jam
Instructions:
- Preheat the oven to 325°F. Spray a rimmed baking sheet with the cooking spray or line with a silicone baking mat. Set aside.
- In a medium bowl, whisk together the flour, baking powder, and salt. Set aside.
- In the bowl of a stand mixer fitted with the paddle attachment, beat the butter and sugar together until light and fluffy, scraping down the sides of the bowl with a spatula as needed, for about 2 to 3 minutes. Beat in the egg and vanilla until smooth. Gradually beat in the flour mixture until a dough forms. If green fingers are desired, add a few drops of green food coloring until the desired shade is achieved.
- Using about 1 ½ tablespoons of dough at a time, roll the dough between your palms into 5-inch long fingers about ½-inch thick. Firmly press a sliced almond into the end of each finger to make fingernails. Make several horizontal cuts, about ¼-inch deep and ½-inch long, in the center of each finger to make knuckles. Press the dough on either side of the cuts to shape the knuckles. Arrange the fingers on the prepared baking sheet and bake until lightly golden, 16-18 minutes. Transfer the fingers to a wire rack and cool completely.
- In a small saucepan, heat the jam over low heat until warm, about 2 minutes. Dip the blunt ends of the fingers in the warm jam and arrange them on a platter.